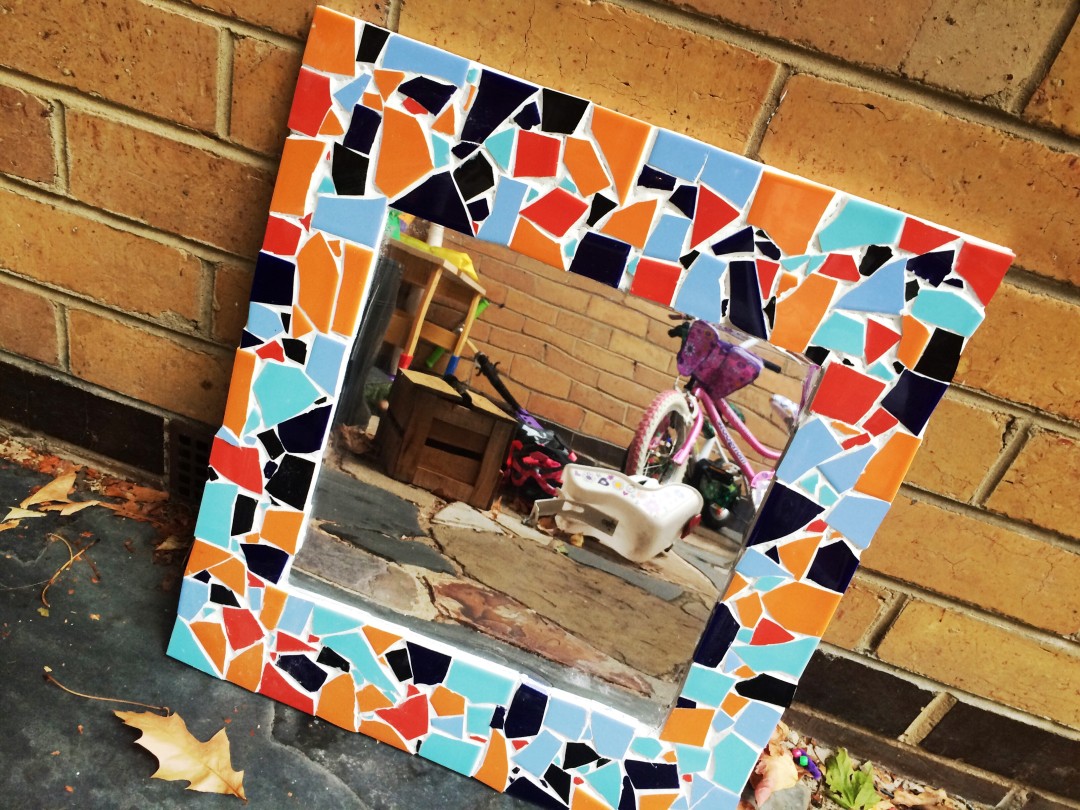
I have been searching and searching for a mirror for our downstairs powder room for AGES! For the life of me, I have not been able to find anything close within a reasonable price bracket that I could legitimately justify. So, I decided to try and make something. I have been meaning to do some mosaic creation for a while now, and what better way than to spend a day with my daughter doing it together.
I have to be honest, this project was soooo much fun and super easy as well. The total cost of the project was $70.00 plus time (which is invaluable anyway). What can I say.. we were both pretty happy and surprised by our outcome too..
What you need:
+ Thick board (about 5mm think) cut to the shape and size you want.
+ Mirror for the centre – I found a pack of 3 plastic mirrors for $14.95
+ Tiles – if you plan ahead, you could find and source samples, old plates etc. We ended up buying square tiles from bunnings in the colours we wanted.
+ Wall tile adhesive- use the real deal.
+ Mosaic grout – I found this in the craft section of bunnings. In hindsight, you could also probably use tile grout
+ Tile grout scraper –
+ Hammer
What to do:
Cut the board (in our case we used a square shape) to the desired shape or measurements. I pre-measured the mirror to be placed in the centre and then asked the guys at Bunnings to cut.
Place your tiles or plates in between some tea towels and SMASH. Not so hard, just a little gently to break up the tiles. Although great for the kids to do, be careful when picking up the broken tiles as there can be some sharp edges. I managed to cut myself a couple of times.
Rule up and place your mirror in the centre of the board. Peel off the backing and stick down.
Work in sections with the tile adhesive and tiles as the tile adhesive dries very quickly. Find tiles with straight edges for the sides of the board or to edge the mirror. We just placed tiles randomly, but if you wanted to work within some other pattern, you could do this as well.
As you work through the sections and the majority is filled, begin to fill smaller ‘gaps’ with smaller tiles. We had to break small tiles into smaller pieces to fill these gaps.
Let dry for a couple of hours.
Begin to make the mosaic grout and follow the instructions on the back. With a toothpaste kind of consistency, get a sponge and begin to fill the board and gaps. Once filled, with a damp cloth, wipe the excess grout off the glue.
I also used the grout for the edges of the board.
Let dry and then stand back and observe your artwork.
Our next big question is what to do next.


